Drain, flush and save: Water heater maintenance 101
Water Heater Updated: September 16, 2021
Most plumbers recommend that you drain and flush your water heater tank at least once a year. This process removes accumulated sediment that can damage the tank or heating equipment, helps improve efficiency and may extend the life of your water heater.
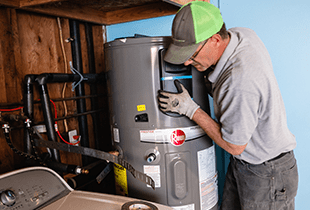
If it’s been over a year or your water heater is making unusual rumbling or popping noises, follow the instructions below to learn how to drain, flush and save.
Consider the age and condition of your water heater. If it’s over 10 years old, there is a chance that the draining and flushing process could expose other, more serious issues. Not sure how old yours is? Read our handy guide here.
Most plumbers recommend that you drain your tank before flushing it. Draining your tank requires the water supply to be shut off so your tank can be emptied. Turning the water back on after draining will help flush out any sediment that has built up on the bottom of your tank.
Before draining:
To begin draining, connect one end of your hose to the water heater drain valve and direct the other end to the floor drain. If a floor drain or an exterior drainage location is not available nearby, you may need to drain the water into a bucket and empty the tank in multiple steps. Then, loosen the drain valve to let the dirty tank water drain through the hose. Turning on the hot water at another faucet in your home can help the tank drain faster.
Too much sediment in the tank may cause the drain valve to clog. If this happens, try stepping on the hose to push water back into the tank and help break up the sediment. To avoid clogging the floor drain, use a kitchen colander to catch any loose sediment coming through the hose.
Your tank should be fully drained when water stops flowing through the hose.
Once all the water is drained, keep the hose in the drain valve and turn the cold water valve at the top of the tank back on to begin the flushing process. The new water running through the tank should flush out any remaining sediment. Keep the valve turned on until the water from the hose runs clear. Then turn off.
Tighten the drain valve and remove the hose. Turn the water supply back on and let the tank refill. While it’s refilling, turn on another hot water faucet until it flows smoothly. Wait at least 15 minutes for the tank to fill up, then turn the breaker back on (electric tanks) or turn on the gas and relight the pilot (gas tanks).
That’s it! Your water heater is now drained, flushed, refilled and ready to let the good times flow.